June 29 – July 7, 2019
Factor e Farm
Maysville, Missouri USA
Build Yourself. Build Your World.
Ever have an idea and not know what to do with it? Ever wish you could build something to solve a problem that no one else has solved? But you did not know where to start? Well, you are 9 days away from being able to do that. In our 9-day Open Source Microfactory STEAM Camp, you’ll learn how to build a 3D printer and other production machines, you will learn the basic principles of design, and you’ll be able to turn your ideas into prototypes, so you can turn your prototypes into a business. We will teach you the basic language of design spanning many fields – so you can apply these skills to shape the world that you would like to build. We will teach you about our Construction Set approach – with common libraries of parts – to make powerful design achievable with basic skills.
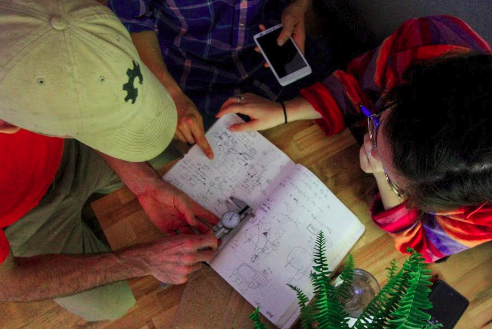
Collaborative Design Training
Open Source Ecology is about collaborative design for a transparent and inclusive economy of abundance. The Open Source Microfactory STEAM Camp will explore this mission with hands-on projects and swarm-builds. You will get a chance to build powerful tools that could be used in the real world – in time frames that you did not think were possible – by leveraging collaborative, open source design.
The Open Source Microfactory STEAM Camp is a hands-on, immersion learning experience for designing and building useful, tangible products. We call this STEAM with a Purpose – shifting the economy towards open source product design – and open source microfactories as the new engines of production.
Universal Axis: a Robotics Construction Set
The goal is to expose participants to a wide range of design and prototyping skills which culminate in a basic knowledge of a collaborative, open source product development process. We will use OSE’s open source Universal Axis construction set as a scalable and modular robotics platform. The Universal Axis allows anyone to build a wide range of automation and CNC machines from scratch – easily and inexpensively. By using the Universal Axis – and combining it with various tool heads – one can build 3D printers, CNC mills, printers that print in metal, a CNC torch, a CNC router. This workshop will allow participants to build one or more of these.
As an application to practical product development – we will build a first prototype of a 3D printed cordless drill. Next year, we will run an incentive challenge to develop a professional grade 3D printed cordless drill, so this workshop will lay some initial groundwork.
First 4 Days
The first 4 days will in general focus on skills learning, and the following 5 days will focus on projects for applying the skills learned. However, at all times we shift between the classroom and builds in the workshop, so this is a blended experience. About half the time will be in the workshop, and half in the classroom.
We include a build of a 3D printer from scratch in the first 4 days. Participants are welcome to take finished printer home with them (not included in the cost of the workshop). We will have a 3D printer cluster of 8 OSE printers available throughout the workshop for prototyping, and we expect about a dozen more to be built by the participants. The goal is to build and use the tools that we built to further bootstrap our ability to make things throughout the workshop. We have an opportunity to build a 1 cubic meter 3D printer in the first 4 days as well, and a tall 6 foot tall printer with an 8×8 inch bed for printing tall columnar building materials.

5 Project Days
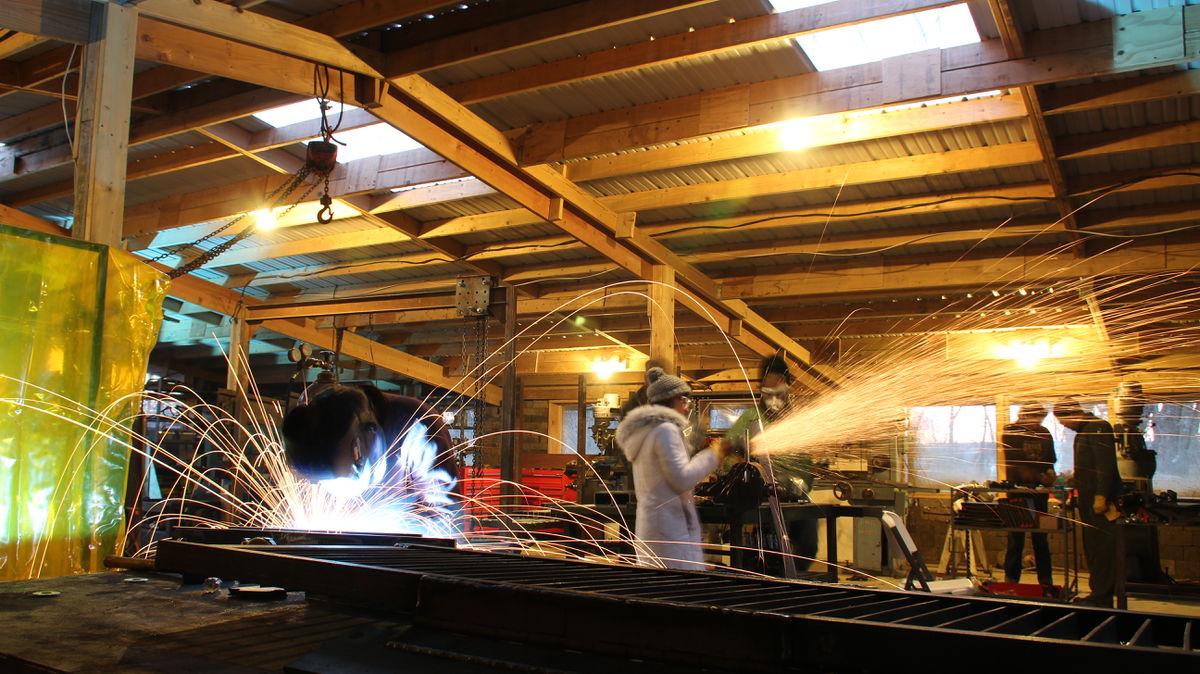
After the initial 4 fundamental skills days, we will select projects to work on. The workshop focuses around 3D printers, CAD design skills, and machine design skills using the Universal Axis Motion System. We will use the 3D printers to print parts for larger machines – and will have a wide array of stock materials admissible for use by anyone during the workshop. As such, there is a capacity to participate in building CNC machines, and to use standard metal fabrication equipment including torches, welders, an ironworker machine for shearing steel, metal cutoff saws, grinders, and other tools. Workshop participants will be let loose on the use of stocked materials and tools.
As a result – materials and supplies will be on hand to produce a large 3D printer (1 cubic meter), heavy duty CNC mills, a metal- printing 3D printer, a CNC torch, a 1 hp CNC router, and a 2W laser cutter head. Please see the list of available Tools and Supplies below.
The idea is that we will teach basic training in the first 4 days – and we let the group’s creativity run wild in the last 5 days. The only limitation is that we select projects that we think we can finish to a satisfactory state while meeting the Learning Objectives of the workshop. as opposed to just starting something crazy. The list of available materials and equipment for building is as follows:
Tools and Infrastructure Available During the STEAM Camp:
Tools and Infrastructure:
-
- Six 200A MIG welders – can be used for welding, or for a MIG metal 3D printer
- 4 acetylene torch sets
- 4 abrasive metal cutoff saws
- [4] 15A grinders; [4] 5A grinders
- Ironworker machine (1”x12” steel flats capacity, ½”x6”x6” angle capacity
- 12 cordless drills, 4 corded drills, 1 mag drill
- Shop air
- 3 phase power, 15kW
- 4000 sf workshop, with about half of this as open space for working, with movable tables
- Soldering irons, heat guns, multimeter, oscilloscope.
- Wide array of hand tools.
Supplies:
- Stock steel – flats and angle from ¼” to 1” thick; 4×4 inch square tubing; 2×2” square tubing. These can be used for frames and structures.
- About a dozen hydraulic motors from 600 to 15000 in lb torque – which can be used for a heavy duty CNC mill or other heavy rotors. Hydraulic power unit of 12 gallons per minute at 3000 PSI.
- Shaft, and bearings for shafts – typically 1”, 2”, and 3” – for making universal axes, rotors, drive systems, and other power transmission applications
- Universal rotor – 3” shaft at 15000 in lb torque
- Plenty of 12V power supplies and controllers for the Universal Axis
- Stepper motors – [12] of 1200 oz in size, and [100] of 72 oz in size
- Couplers, GT2 belts
- machine torch (straight torch) for CNC torching
- 2hp router – can be used for CNC router
- Small 2W laser head
- Nichrome wire for making heating elements
- 3D printers – and filament – for printing of solid objects and rubber goods such as belts and o-rings
- Parts for a Precious Plastic Shredder.
- Parts for a Lyman Filament Maker.
- D3D CNC Circuit Mill
- 1000 neodymium 52 magnets, 12mm x 3 mm. Motor winding wire.
- Wire and connectors of all sizes. 1/16”x1/4” brass for making electrical plugs.
- Ball bearings for making linear rails.
- And much more.
The goal is for participants to learn basic proficiency in a survey of applied topics. We will have an 8:1 student to teacher ratio.
- How to build and operate a 3D printer
- How to apply the Universal Axis in building a wide range of CNC machines, using a completely open source toolchain
- Survey of design requirements for building specific CNC machines such as 3D printers, CNC mills, torch tables, and routers
- Basic steps of collaborative open source product development and its documentation
- How to design a 3D printed cordless drill
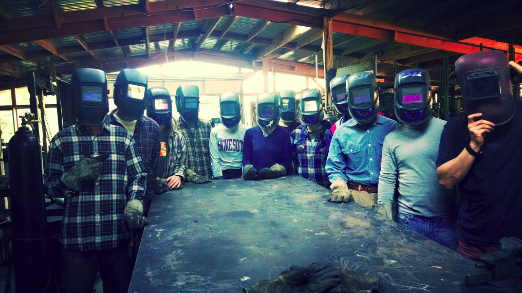
- Hands on use of workshop tools from 3D printers to welders
- Teamwork to solve problems in a collaborative design scenario
Anyone interested in open source appropriate technology and STEAM with a purpose is welcome to attend the STEAM camp. We have no specific age limits, and we focus on mindset of learning. We welcome Women in STEAM, and Dr. Catarina Mota will present a special invitation to women on Day 2 by sharing her own story of learning practical skills.
We are seeking individuals who want to build the world around them – based on open source principles – and this workshop is intended to provide inspiration and the tools to do so. We have a focus on understanding HOW to design – not just to build things – and applying our skills to make a more transparent and inclusive economy of abundance. We are looking especially for those people who want to get their hands dirty – as responsible technology can come only from involved citizens. To this end – we demistify the skills necessary to build robust and human-centric machines – easily and at low cost.

Overview Schedule
The Open Source Microfactory STEAM Camp is a 9 day immersion education experience with hands on projects. We will teach participants about design, and the hands on skills necessary to build the designs efficiently and effectively. We focus on fully open source tool chains for design and build. We will build production tools that we use during the actual workshop – adding to the existing OSE workshop facility.
After developing fundamental skills, participants move on to several projects of their own choosing to be carried out in the remaining 5 days. Ideally, we break into about 4 groups, and participants have complete freedom to shift between groups.
This experience is unique in that participants get a chance to build real products and potentially powerful machines. The schedule that we propose below is completely to be determined by the interests of the participants. We will have materials available for carrying out all the builds: stock steel, shafts, couplers, stepper motors, controllers, Universal Axis components, etc. We will also have the ability to print any parts in plastic and flexible materials (rubber) using the ~20 3D printers as mentioned above..
Detailed Schedule
The typical day is 8 hours of instruction/workshop activity each day. There is a one hour break for lunch. We start at 9 AM , and end at 6 PM each day. The following is a detailed schedule, to be finalized.
Day 1-4 – The first 4 days focus on learning the fundamentals.
- Introduction to OSE. Introduction to collaborative, open source product development. We begin to cover the design of mechatronic machines.
- Build a 3D printer – We will build a number of 3D printers with teams of 2-6 people per printer – depending on how many people reserve a printer to take home with them in the registration below. We will have a total of ~20 printers after these are built in the first days for rapid prototyping as a group effort for making parts.
- Configure 3D Printer – learn how to calibrate your printer and how to prepare files for printing.
- 3D CAD Design – You will be learning a powerful workflow for design using FreeCAD open source mechanical design software. We will teach you how to use the OSE Part Library to design machines.
- Big Printers – We will have 2 large frames available for building a large printer with a SuperVolcano nozzle for printing up to 20 lb of filament per day. One will be a cubic meter frame and the second will be a 6’ tall frame for an 8” print bed. We have an opportunity to build these larger printers using the 1” Universal Axis.
- Circuit Making – We will learn how to use simple techniques for environmentally-friendly (recyclable) etching of circuits using a laser printer. We will learn about simple 3D Printed circuits, and we have the opportunity to build a circuit such as a charger for a cordless drill or a DC power supply that can be used to power our printers.
- How to document on the OSE Wiki – We will be doing relevant development work throughout the week, and we will document and coordinate by posting content to the wiki in real-time throughout the workshop.
Machine Design Sessions
Throughout the 9 day Camp, we will have a total of eighteen 1-hour classroom sessions dedicated to a survey of design and build techniques that we use at OSE on a regular basis. The goal is to equip you with design thinking ability – a generalized skill set that can be applied to just about any build project. Specifically – the design skills taught in the 18 sessions will enable you to make sound design decisions during the workshop. We will guide you as much as possible – but the more you know about design – the better informed design decisions you will make.
When you are equipped properly for design thinking – you can design products that consider performance, cost, build speed, ease of build, user repairability, and lifecycle stewardship – all at the same time. Very few people have this capacity – because in most cases these 6 values are not even set as requirements. At OSE, these 6 features are all critical to our designs – and we emphasize that democratized technology must have all these 6 properties.
The 18 design sessions are:
-
- Frames – how to design a space frame for anything from a 3D printer to heavy duty machines such as mills and lathes using the Universal Space Frame. Applications – the workshop involves building frames for various machines, and understanding frame design will allow you to build robust and structurally sound frames for any application – quickly and effectively.
- Universal Axis – How to build and design the Universal Axis – based motion or system for any CNC drive or automation application. Symmetric vs unsymmetric axes.. Scaling in size and power. Universal drive system. Adding a rotary axis. How to attain 10 micron precision with 180 lb drive force, and 1000 lb of drive force with 1000 micron precision. Applications – you will be able to design a Universal Axis for any of the projects that we do during the camp – and you will be able to understand whether it will hold structurally, and combined with another design session – whether it will have the correct speed and torque.
- Stepper Motors, Electric Motors, Hydraulic Motors – How different types of motors work. Different sizes and forces, their limits, and how to increase torque via geardown. Speed and range of applications. Application – you will understand how to select and size a correct motor for the task, and you will be able to determine to within calculable limits prior to testing whether the selected motor will do its job.
- Universal Stepper Motor Controllers – driving a stepper motor motor and control system of any size with on-board and external drivers can be done using the popular RAMPS controller; costs involved; Applications from 3D printer non-contact to 1000 lb force. Applications – You will be able to set up the multipurpose RAMPS controller for any machine based on the required force/speed requirements. By understanding essential controller wiring, you will be able to connect RAMPS properly to stepper motors without sending up smoke. This applies to CNC machines and any other drive, such as material shredders or drive wheels.
- Marlin Based Drive – How to use the open source Marlin controller firmware for automation and CNC machine design. Applications – You will learn how to configure the firmware for any geometry and other features of your system, based on the specific functions of the machine that you are designing.
- G-Code generation – How to generate toolpath files for automation and manufacturing applications. Manual generation of simple files, 3D printer slicers, and other open source g-code generators. Applications – Do you want to convert design concepts into machine instructions so that your CNC machine builds something for you? You will learn how to create these machine instructions for various machine types.
- Geardowns – The compact design of planetary gears. Online planetary gear generators. 3D printing. planetary, split ring planetary, as wheels large and small; from 3D printer extruder to split ring planetary for robotic arms. Stepper to planetary stacked gears. Compactness of planetary vs pulleys. Wear-resistance of belts vs planetary. Applications – depending on the project we build – we may need significant geardown. You will be able to design the geardown – print it with a 3D printer – and couple it to whatever you are moving. For example, you will be able to take even a small stepper motor – and gear it down enough to drive a plastic shredder.
- 3D Printer Extruder Design – How to design an optimal extruder – the heart of a 3D printer. Optimized design for filament access and short filament path, and scalable heater blocks. Simple extruder. Non-threaded heat breaks and nozzles for advanced design. Why nobody does this. Material deposition rates. Applications – If we build a large printer, we may want to design our own extruder because the available ones are not big enough and they cost $100 for a 25 cent piece of aluminum. If we understand how to design an extruder, we can build one at low cost. We can also design different extruders for specific applications. For example, there is currently no commercially available 2.85 mm extruder for printing soft rubber.
- Shafts and bearings – Different ways to implement shafts and linear bearings. Bushings for Universal Axis, bearings for rotors; mounting of wheels. On-wheel or on-shaft bearings; 2 point mounting; rating of shafts for axial and radial load. Supported and unsupported shafts. Planetary herringbone for axial load management. Planetary gears as wheel-integrated bearings. Air bearings. Flexible 3D printed bearings. Lubrication. PLastic vs metal. Linear bearing with cycling balls. Applications – whatever we build, it will move or rotate. It will have shafts and bearings, and we need to understand some basics about their design so that we can handle high loads and speeds.
- Couplers – The critical link of taking power from one object to another. Coupler strengths for set screws, geometrical couplers, and keyways. Solid, chain, and lovejoy couplers. 3D printed couplers. Drilled couplers. How to make couplers by welding and using a lathe. Plug inserts for making couplers. Applications – we will need to understand how to connect a motor to a moving shaft. Once a lot of force or long time is involved – this is the difference between a machine that works or breaks. By understanding couplers and their basic properties – we will keep our machines working. Connecting a shaft to a motor is one of the critical aspects of machine design.
- Pulleys, Belts, Screws – How to implement power transmission in direct drive and geardown. GT2 belts. 3D printed pulleys. 3D printed belts. Mechanical advantage of a screw. Applications – we can create amazing gear reduction with screws, and amazing accuracy or torque with proper belts. You will learn basics of doing this on small and large scales.
- Force and Torque Calculations – for stepper motors, shaft torque in general, geardowns, rpms and hp; clamping force. Position, velocity (IPM), acceleration (max Acceleration in 3d printers), jerk. Common RPMs, such as drill, stepper, and fast electric motor. Applications – Desired performance in mechatronic systems must be calculated – otherwise you are just guessing whether something will work or not. Calculations allow us to determine whether something will be efficient – and for energy use – efficiency is important if we care about environmental impact.
- Structural Calculations 101 – compression, tension, elongation; PSI of materials and back-of-envelope strength calculations; beam bending calculators; FEA in FreeCAD; flats, angle and i-beam; gussets; space frames. Isotropic and nonisotropic materials. Hardness and Brittleness. Applications – How do you know that the frame you built will hold up to what you are trying to do – or that a structure will hold under a given force or weight? Being fluent in back-of-the-envelope calculation on this helps you gain great insight so that you are doing less rework.
- Thermal calculations 101 – Blackbody radiation; solar heating; considerations for 3d printer extruder and heatbed design; conduction for heat sinks; R value; convection. Applications – If we are designing a heat bed, 3D printer extruder, or a plastic filament maker, we need to understand some basic considerations.
- Circuits – How to make simple circuits from 3D printing, etching, milling, and soldering. Wiring. Control panels. 3D printed circuits. GFCIs. Milled and etched circuits. Doped circuits. What to do when features are too small to solder: sockets and flux. Applications – our goals include making common devices such as power supplies, chargers, and speed controllers. Understanding the basics of how to connect or solder a bunch of electronic components together is a critical skill.
- Hydraulics 101 – Basic design of hydraulic power systems. Analogy to water, air, and electrical circuits. Basic circuits, safety. Applications – hydraulic motors are the most torque and power dense motion component known to human kind. They are also the lowest cost method of attaining such motion. We may want to use a hydraulic motor if we are building a large CNC mill, drill, or lathe – or if we want to drive a material shredder or a tractor without any geardown.
- Heater Elements – How to make insulated nichrome heaters for heated beds, small furnaces, and plastic extruders. Calculations. Applications – We will be building a large 3D printer – so building a large heated bed may be involved.
- CNC Machine Design – special considerations for building specific CNC machines: 3D printers including metal-printing 3D printer, heavy duty CNC mill/drill/lathe; screw machine; CNC torch table; metal-printing 3D printer, small laser cutter; CNC router/aluminum mill. Applications: While CNC machines consist essentially of a frame, a motion system, and a specific tool head or function – if a CNC machine contained only these 3 elements – it would not work well. There are certain supporting elements that are required to execute that function effectively. Here we discuss what those considerations are for each machine so we design them into the system – and our machine actually attains industrial productivity.

Days 5-9 – Project Days
The unique feature of OSE’s program is its applied, hands-on imperative. We are offering the opportunity to build a number of practical projects that have the potential to become common products. The goal for the STEAM camp is to begin the process, and depending on the interest and energy – get as far as the participants would like. As part of an open source project – these developments are added to our repository of design so we can continue to build upon it.
These are the suggested projects for which we will have materials on hand. Participants can decide to do any number or all off them, modify these, and the projects can be large or small. We will divide up as groups according to the interests of participants. We suggest 3 groups of 8 participants per project, and anywhere from 1-5 days per project..
-
- Metal printer – application of 1” universal axis with a 200 amp welder to make prints in solid steel on a 24” print bed.
- Heavy duty CNC mill – we will stock 2” shafts to build a heavy duty mill capable of milling steel like butter – using a frame of 2 feet on each side as our prototype. We will use a stepper motor and belt systems that can deliver 100 lb of force per axis – for a total of 6 axes and 200 lb of tool force on each axis. The machine can be fitted with a hydraulic spindle taken from our supply of a dozen or so hydraulic motors.
- CNC torch table – we will have a machine torch head available, and we can build a small CNC torch of 2’x2’ working area for making small objects such as heavy duty shredder blades. The trick here is designing a holder for the torch. We have 2 different torch heads available for this.
- Cordless Drill. This is largely about designing or reverse engineering a 3D printable cordless drill geometry. We will provide small motors, 18650 batteries, chucks, and switches. We will have a broken drill to dissect for ideas. We have the ability to make simple circuits for electric motor drive or battery charging. We will design and build a battery pack and other parts of the drill from the ground up.
- Motors, geardowns– We can build an efficient, open source, 3D printed, brushless DC electric motor – a Halbach Array motor, using 3D printed magnetic PLA plastic. We can experiment with planetary geardowns. These could be 3D-printable planetary geardowns for a small stepper motor such as this simple planetary or this split ring planetary that can be used, for example, as a near zero backlash indexing head for a CNC mill. Or, we can use such geardowns to power a Precious Plastic shredder – thus reducing cost for the shredder drastically. The ideal outcome would be to use the open source 3D printed motor for a practical application such as driving the Precious Plastic Shredder.
- Other topics – If you as a potential participant have experience in topics related to the Open Source Microfactory that other participants may benefit from, and you would like to present during the STEAM Camp – let us know and we can determine if that would be a good fit. Our goal is to learn from each other.

The Universal Axis is a scalable construction set for robotics and CNC machines. It is a set of building blocks that allows you to build a 3D printer of any size – as well as other machines such as a heavy duty CNC mill, a CNC Torch Table, a CNC router, a CNC laser cutter, and much more
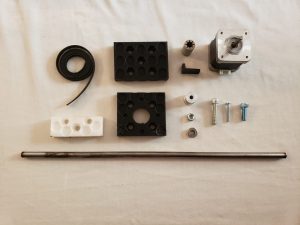
The Universal axis is simple, made of 3D printed pieces (in red) and other easy-to-source off the shelf components:
There are only 14 unique parts in the Universal Axis System. Yet these 14 part are sufficient to build all the motion axes in 3 dimensions. If you can build 1 axis – you know how to build all the other axes. This is effectively a Robotics Construction Set, as these axes can be reconfigured and scaled to build many different machines.
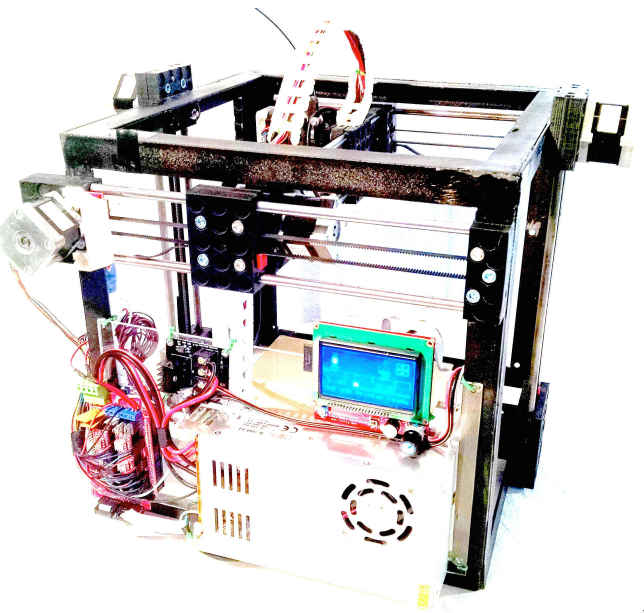
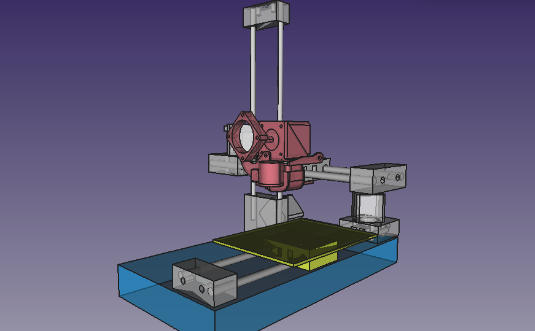
The single assembled axis looks like this in real life:

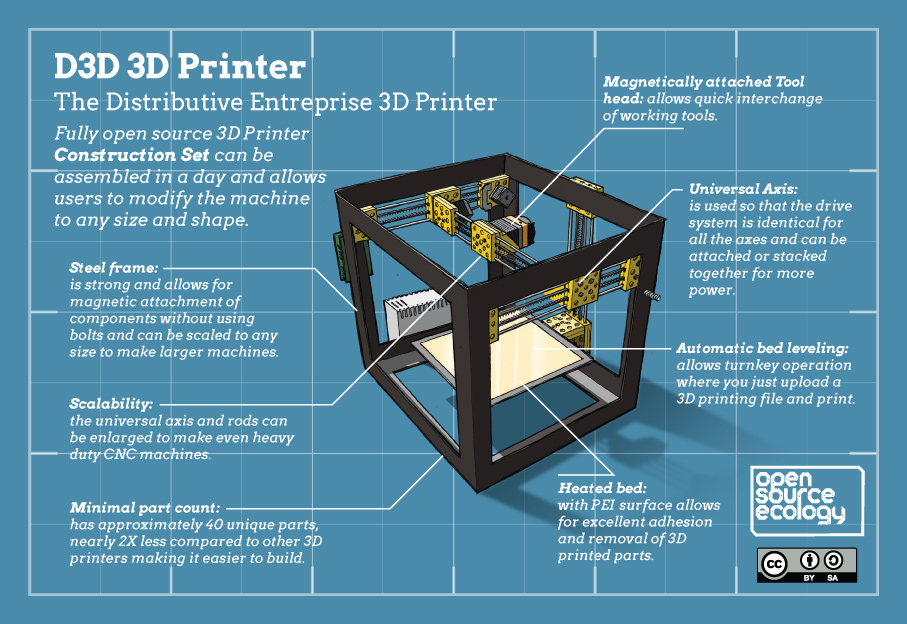
Our standard 3D printer – D3D – which stands for Distributive 3D Printer – is made of this Universal Axis system. You will have a chance to build this printer during the STEAM Camp.
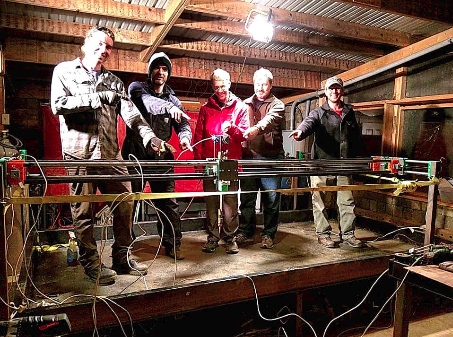
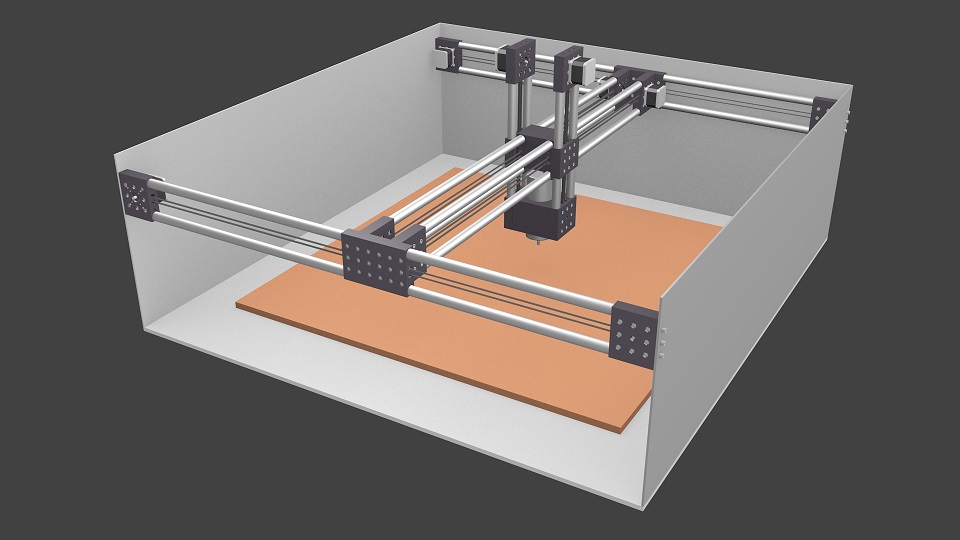
The rods that are used in the Universal Axis can be small – such as 8 mm for a 3D printer – or 25 mm (1 inch) for a larger CNC torch table:
We can hang a small CNC Circuit Mill spindle for a CNC circuit mill:

Or – we can supersize the shafts and 3D printed pieces for a heavy duty CNC milling using 2” steel shafts. This will be the first workshop where we can build the 2″ shaft axis system.
So far we have built the CNC torch table, 3D printers, CNC circuit mill, and a couple of larger 3D printers:
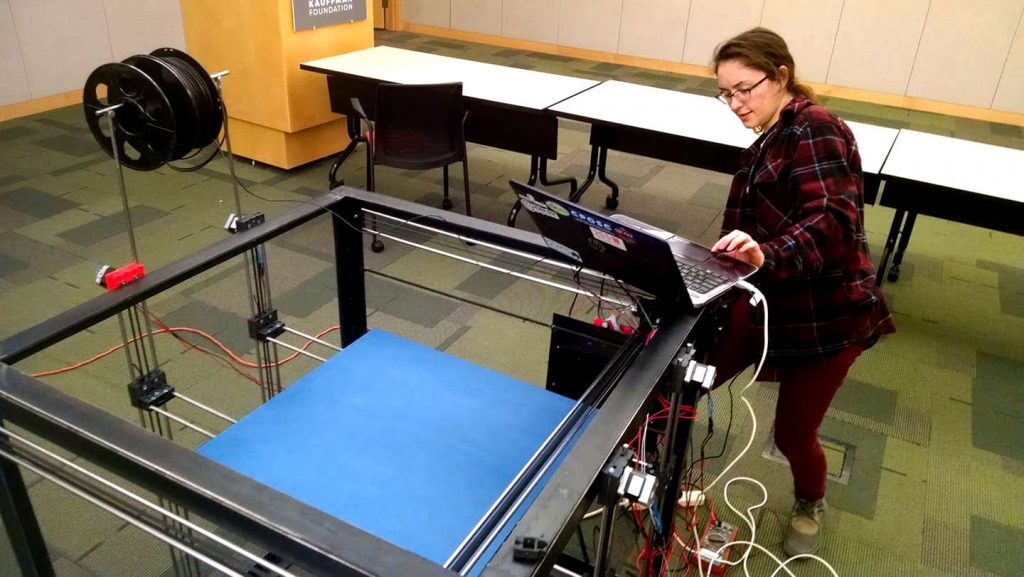
You can also build minimalist machines – such as this minimalist version of a 3D printer – D3D Simple – that doesn’t have a frame and has a moving bed:
The D3D Simple is a minimalist 3D printer that can be built using only 3 axes. Conceptual design only. We will have an opportunity to build the D3D Simple during the STEAM Camp.
Note how the basic axis unit and its ability to connect or stack on other axis units allows for a wide range of design variations. Single or multiple axes can be used as needed.
The flexibility and the construction set approach of the Universal Axis puts CNC machine design within the hands of ordinary people. Depending on the tool head that is used – the machine can have the functionality of the corresponding tool head – whether a 3D printer extruder, a router, a laser cutter, a cutting torch, heavy duty mill/lathe, or many others.
”’In this workshop, you will have a chance to build any of these machines – and much more.”’
In the workshop, you will have a chance to build a 3D printer to take home with you. The kits to take home are not included in the workshop tuition, so you would have to select the kit option in addition to the tuition. The two options are the D3D Simple and the D3D Pro. We are providing the D3D Simple parts kit for $249 (5”x6” print area), and the D3D Pro kit for $799 (8”x8” print area).
The D3D Pro uses high performance parts, and we will be offering the D3D Pro – Eco Edition for the first time. The specifications include:
- Uses the 2.85 mm Titan Aero Extruder with Volcano nozzle which can handle up to 1.2mm print nozzles for print deposition rates of up to 5 lb/day. The D3D Pro Eco comes with a standard 0.5 mm nozzle. The 3mm Titan Aero Extruder also works reasonably well with 1.75 mm filament out of the box.
- PEI heatbed surface with 200 mm x 200 mm print area.
- Eco Edition features insulated heatbed for 30%-60% lower energy consumption while printing with heated bed
- LCD control screen with SD card for untethered operation, or control via USB
- RAMPS control system with Marlin firmware, running on 24V for higher top speeds
- Silent stepper drivers – uses TMC2208 in legacy mode instead of A4988
- 500W, 120V heatbed for bed heating faster than you can say sizzle
- Built-in GFCI electrical safety breaker and auxiliary outlet
- Auto bed leveling with babystepping correction
- Ability to print a wide range of plastics beyond PLA and ABS, and including polycarbonate, nylon, flexibles, and more.
The D3D Pro is intended for industrial-grade parts production. The E3D Titan Aero is one of the leading 3D printer extruders, and it works reasonably well flexible material.
For a side-by-side comparison of D3D Pro to other leading kit printers, see our comparison page.
The D3D Simple is a basic 3D printer kit, without any of the advanced features of D3D Pro. It contains all the parts necessary to build a working printer, with some fabrication required. This is a good example of how the user has full control over the 3D printer – as it is transparent in design, easier to build than the D3D Pro because of lower part count, and can be repaired easily if anything goes wrong. The kit includes:
- All the parts for making 3 universal axes, including 3D printed parts
- Platform for assembling everything together
- 125 mm x 175 mm print area (5”x6”)
- OSE Simple Extruder – an MK8 style extruder.
- Metal bed, unheated, for use with blue painter’s tape as the print surface.
- LCD control screen with SD card for untethered operation, or control via USB
- RAMPS control system with Marlin firmware, running on 24V for higher top speeds
- Automatic bed leveling with babystepping correction
- Can print PLA, ABS, and semisoft flexible filaments such as TPU.
Have questions? Drop us an email: info at opensourceecology dot org
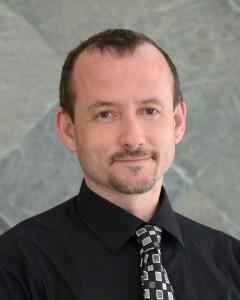
- Marcin Jakubowski (USA)- Marcin was trained as a fusion physicist. He left academia right after finishing his Ph.D. to start a farm – in Missouri – and founded Open Source Ecology. For the last 7 years, he has been working on the Global Village Construction Set – a set of enabling tools and machines for building regenerative infrastructures. Marcin is passionate about creating the Open Source Economy – a new operating system for Earth. See Marcin’s bio and Global Village Construction Set Ted Talk:
- Catarina Mota – Catarina is co-founder of Open Materials (do-it-yourself smart materials) and AltLab (Lisbon’s hackerspace). Catarina recently finished her PhD dissertation on open and collaborative practices for the development of physical goods and technologies. She is currently a Research Chair at the Open Source Hardware Association and a TED Fellow. Previously, she co-chaired the Open Hardware Summit 2012, served on the board of directors of the Open Source Hardware Association, taught as an adjunct faculty member at ITP-NYU, and was a fellow of the National Science and Technology Foundation of Portugal. Catarina’s new initiative is the Open Building Institute, with a mission to bring affordable, open source construction to the world. You can also see Catarina’s earlier work presented at TED:
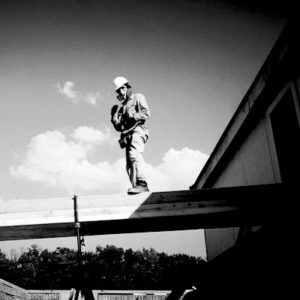
- William Neal – William is the Director of STEAM at London International Academy. Previously he was a teacher at School of the Nations in Guyana, South America, the Vice Principal Academic for London International Academy and Vice Principal for Nancy Campbell WorldCit Academy. He has taught STEAM education to teacher candidates at Western University (Althouse) since 2017. He received his B.Sc. Hon. in Theoretical Physics at the University of Guelph, B.Ed. at the University of Western Ontario, M.Ed. Curriculum Studies at the University of Toronto, and his PQP (Principal’s Qualification). In 2011 William spent two weeks at Factor e Farm, noticed how educational the experience was for his son and began incorporating activities based on open source software and hardware into his classes. This has transformed his career such that his classes are now full of integrated hands-on and project-based activities linked to the improvement of the community and the betterment of society. William started the first OSE STEM Club at the London International Academy in 2018.
Logistics
Workshop fee includes workshop tuition only.
Accommodations
Participants may secure a hotel in Cameron, Missouri (15 miles away). Please note that there is no public transportation between Cameron and Factor e Farm and that we cannot pick you up or drop you off on a daily basis during the workshop. Car rentals are available at the KCI airport.
We have 17 spots for participants who want to stay at the HabLab—our shared-room dorm. There is no extra cost for staying at the dorm and spots are filled on a “first come, first served” basis. Please note that this is a very rudimentary earth building and our accommodations are rough. The dorm rooms may be noisy due to late night conversations by participants. Factor e Farm is an experimental facility that is permanently under construction, so please gauge your expectations accordingly. If you want a more comfortable stay, we recommend that you stay in a hotel.
We also have 4 single rooms in HabLab, opening right to the outside as opposed to the common area. These rooms can be rented for $35/day. These have privacy, but not a private bathroom. You would have to use the shared bathroom/shower in the Hablab. If you would like to have full privacy and maid service, we recommend that you book a hotel room in Cameron.
We also have primitive camping on site which includes a composting toilet. Showers and a bathroom are located in the HabLab.
Transportation
The nearest airport is Kansas City International (MCI), about 1:15 hours away from Factor e Farm. FeF is located in a rural zone and there is no public transportation of any kind in the area.
If you are driving, please schedule your arrival on site at 6 PM or later on the evening of Friday, June 28. Please schedule your departure on the day after the Camp (July 8) if you need a ride to the airport.
We are scheduling airport pickup at 8 PM on Friday, June 28 for the workshop start on May 29. We are scheduling an airport dropoff after the last day of Camp in the morning of July 8. Airport dropoff will be as early as needed for the first flight, so plan accordingly. Car rentals are available at the KCI airport, if you’d rather not wait for pick up or dropoff.
Since the round trip to the airport is 2:30 hours, ideally we would like to make only one trip t the airport at the times above. The MCI airport is tiny and there isn’t much to do there, but it has a few restaurants/cafes and quiet areas to rest. We will also try to coordinate transportation if any people arriving by car are willing to pick others up from the airport.
To the extent that it’s possible, we request that you try to schedule your flight arrival and departure as above to make logistics smoother.
Meals
OSE will provide continental breakfast, lunch, and dinner. We will have a person preparing meals in the kitchen and on the outdoor grill. We are not growing produce at this time, so we will go to the supermarket for supplies. Our cook will coordinate the menu with participants.
If you need additional food, Cameron, Missouri, is 15 miles away and has a food store and a Walmart. There is also a small grocery store in Maysville, which is 2.5 miles away.
What to Pack
You are welcome to bring your own tools if you wish to. But we will have all the necessary tools on site—as well as work gloves, protective eyewear, and hard hats.
Please bring steel-toe boots – as we may be working with heavy metal objects. Steel toed boots are the safest footwear for any workshop. If not, please bring the sturdiest boots/shoes you have.
This being Missouri, the weather is highly unpredictable. It is likely to be hot in July. It can also get quite muddy when it rains, so sturdy boots are recommended.
Please also bring a sleeping bag and a bath towel if If you’re staying in the HabLab, we have fitted sheets, pillows and pillow cases available – but you may want to bring your own pillow if that’s something that is important to you. If you’re camping, please pack everything you’d normally pack for a camping trip.
The registration options are:
- Early Bird Registration – $895 tuition for the full 9 day program- Early Bird Registration until 11:59 PM CST USA time on May 31, 2019. Regular Registration – $1125 tuition after May 31.
- Tuition includes participation in the full 9 day program starting Saturday at 9 AM CST USA time, and ending at 6 PM on Sunday, July 7. Note that tuition does not include a 3D printer kit. If you would like to take a 3D printer home with you, please select one of the 2 add-on options below.
- Remote Participation – $99. We finally got 1 Gig fiber to our site this year – so we can now broadcast comfortably. Remote participation via video includes access to the live Introduction Lectures (3 lectures over 3 days), and the 18 Design Sessions (see Schedule). The Design Sessions and introduction lectures will start at 9 AM CST USA time and 1 PM CST each day. You are able to ask questions during and after the presentation sessions. These will be recorded for later viewing as well.
Add-ons:
- 3D Printer Kits – If you would like to build a 3D printer kit to take home with you, you can get the D3D Pro for $799 (total of $1694 with Early Bird Registration) and the D3D Simple for $249 (total of $1144 with Early Bird Registration)
- Hablab single rooms (4 of 4 available) – $35 per day ($315 total). Please add this to your total if you would like to stay in one of our individual rooms.
Sponsor another participant or Donate to OSE: We are a nonprofit organization with 501(c)3 status, and you can make tax-deductible contributions to us. You can fund attendance of someone who is on the waiting list for financial assistance. We receive low-income assistance requests for all of our workshops. Sponsor by paying the quantity on the order form below. Please email us at info@opensourceecology.org that you are sponsoring someone else. We can send you a tax deduction receipt. You can also donate via BitCoin:

Bitcoin Address: ”’166yC48RakrZdtsBj36vY9q29CpzknHbxY”’
Payment Options: PayPal, Check, eCheck Bitcoin, Money Order, or Wire Transfer
To register, we use Eventzilla – which accepts PayPal or eCheck options. Using the eCheck option (bank routing + account number) avoids the 3% PayPal fee. To avoid fees, you can send a check to Open Source Ecology, 909 SW Willow Rd, Maysville, MO 64469. We can also accept Bitcoin and and wire transfers. Email us at info at opensourceecology.org for additional instructions.
Register Here:
To register, please select the registration option. If you are interested in the 3D printer to take home or the Hablab single rooms – please submit the extra amount under the Donate to Open Source Ecology option. All sales are final, as we are making significant material purchases in preparation for this workshop.
Are prior building skills required? No, this workshop is intended for everyone, including beginners. We will teach the necessary skills, from building the Universal Axis to welding lessons for beginners to workshop tools in general. There is a wide range of skill sets that can be used during the workshop. If a person has significant skills, they may take on more difficult build tasks, while novices can take easier tasks. Participants who have skills are encouraged to teach others as well, as we will be working on builds collaboratively.
How is it possible to work effectively as a team if there are many people participating? We use modular design, which allows us to break down a complex build into many parts. This way, a large group can coordinate effort by working on different modules, which can then be assembled readily into the final build. We focus specifically on such modular design in order to allow for effective, productive, and enjoyable group builds.
What if people make mistakes and mess up the builds? We encourage people to make mistakes – as that is a way to learn. Because we focus on modular design and design-for-disassembly – mistakes can typically be corrected readily by loosening fasteners, or in the worst case replacing modular parts. For a lot of the program – we have building block parts that are intended to be assembled – providing flexibility just like with Legos. We have detailed instructions for our official 3D printer model. For another part of the program, the intent is experimental design. Even if something does not work, you will gain the design insights of how to do things properly – and you will be able to modify the design readily by virtue of the modular design.
Do you expect to produce working machines during the workshop? For our standard 3D printers in Days 1-4- yes, absolutely. For the experimental machines in Day 5-9 – the results depend on how many people select each project. We encourage the team do do a smaller number of projects if the goal is to finish – but we also see the value of gaining a broader experience if more projects are selected. We have good experience and well-developed techniques for building frames and Universal Axes, which we have built up to the 1″ rod size. This will be the first time that we are building the 2″ rod size universal axis – the mere size of which will be an impressive accomplishment. We expect to be able to finish the structure and preision drive/control systems, and the level of usability of the final product with the corresponding toolhead (cutter, welder, mill, etc) is really up to the participants and their ability to cooperate. Part of the experience is how to work effectively as a team on design that is bigger than any single person can do in the available time. We expect to have both average and superstar participants – and we may see favorable surprises when the team works together. We encourage that everyone adopt a super-cooperator mindset during the workshop – as any of the builds are more than a single person can do alone.

Comments are closed, but trackbacks and pingbacks are open.